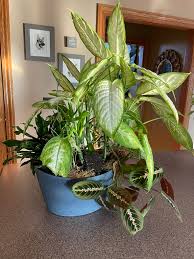
Is your favorite houseplant bursting at the seams? Learn exactly how to separate overcrowded indoor plants safely without killing them.
How to Separate Overcrowded Indoor Plants: The Ultimate Stress-Free Guide to Division
Look, I get it, plant care can be frustrating but nothing brings on a mix of pride and sheer panic quite like realizing your favorite green companion has become an absolute victim of its own success. You bought a cute, modest little Peace Lily or Snake Plant a year ago, and now it is practically busting out of its ceramic container. It looks like a dense, tangled jungle in there, and the leaves are crammed together so tightly they can barely catch the light.
First off, give yourself a massive pat on the back. Having an overcrowded plant means your doing an incredible job keeping your green roommates happy. But here is the real talk: leaving them permanently crammed together is a recipe for trouble down the road. They will start competing with each other for water, suffocating each other’s root systems, and blocking air circulation, which invites pests.
Separating them—a process botanists call “division”—is the perfect solution. Not only does it give your plants a fresh lease on life, but it also gives you an amazing bonus: free plants!
Here at LeafCare.xyz, we want to take the high-stakes anxiety out of plant surgery. In this comprehensive masterclass, we are breaking down exactly how to separate overcrowded indoor plants safely, calmly, and with zero plant-parent guilt.
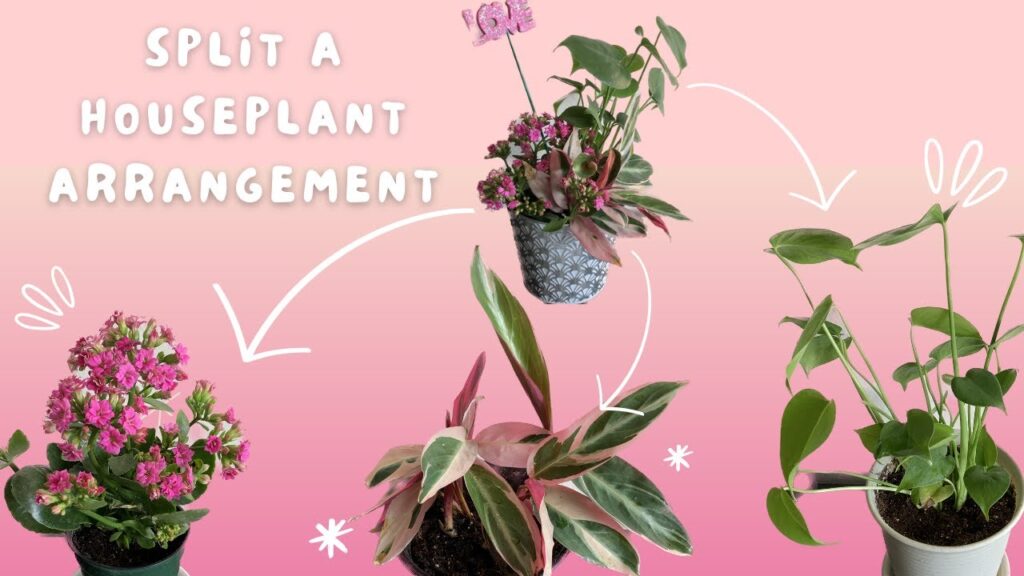
When Should You Separate Your Overcrowded Houseplants?
Before you pull out your gardening gloves, you need to make sure your plant is actually a candidate for division. Some plants love being a bit snug in their pots, while others will actively start declining if they are forced to share a cramped studio apartment with twenty of their own offshoots.
You should consider separating your indoor plants if you notice any of these classic warning signs:
- New leaves are growing significantly smaller than the older, mature foliage.
- The plant requires watering every two days because the dense root mass leaves no room for soil water retention.
- Multiple individual clumps or stems are physically pushing against the inner walls of the plastic pot, warping its shape.
- The center of the plant is turning yellow or dropping leaves because no air or light can penetrate the dense core.
Division Methods Compared: Which One Does Your Plant Need?
Not all indoor plants grow the same way, which means you cannot separate them all using the exact same technique. Understanding how your specific plant’s root structure works is the secret trick to a smooth separation.
Below is a quick breakdown of the primary division styles and which common houseplants thrive under them.
| Division Method | How It Works | Best For These Plants | Risk Level |
| Rhizome / Root Slicing | Cutting apart thick, horizontal underground stems with a clean blade | Snake Plants, ZZ Plants, Cast Iron Plants | Medium (Requires an intentional, clean cut) |
| Clump Separation | Gently teasing apart individual root crowns that have formed side-by-side | Peace Lilies, Calatheas, Anthuriums, Ferns | Low (Mostly relies on finger-untangling) |
| Pup Detachment | Snips off the miniature baby “pups” that sprout around the base of the mother plant | Aloe Vera, Bromeliads, Pilea (Chinese Money Plant) | Very Low (Simple, straightforward snips) |
The Golden Rules of Plant Separation
Before we jump into the physical steps, keep these three essential rules in mind to minimize transplant shock.
First, never separate your plants in the dead of winter. When light levels are low, your houseplants are essentially resting. Their metabolism slows down, meaning they won’t have the cellular energy to heal damaged roots. Always wait until the active growing season of spring or summer.
Second, always use sterilized tools. An open root wound is highly susceptible to soil-borne fungi and bacteria. Wipe down your knives or shears with rubbing alcohol before you make a single incision.
Finally, accept that a few roots will snap during the proccess. It’s totally fine! Healthy plants are incredibly resilient and will rapidly regenerate new root hairs once they settle into fresh, nutrient-rich dirt.
Step-by-Step Guide: How to Separate Overcrowded Indoor Plants
Now that you have your supplies and your plant is ready, let’s walk through the physical separation process together.
Step 1: Prep and Hydrate the Patient
Water your overcrowded plant thoroughly 24 to 48 hours before you plan to separate it. This is a crucial step. Wet soil particles slide away from root structures easily, and hydrated roots are much more flexible, meaning they bend instead of snapping like dry twigs when you try to pull them apart.
Step 2: Carefully Slide the Plant Out of Its Pot
Turn the pot sideways on a clean table or outdoor tarp. Gently squeeze the sides of the container to loosen the soil structure. Grasp the plant gently at the very base of the stems, near the dirt line, and slowly slide the entire root ball out. If it is stuck, tap the bottom of the vessel firmly with the palm of your hand to break the suction.
Step 3: Clear Away the Excess Soil
Before you can separate the stems, you need to actually see what you are working with. Use your fingers to gently massage the root ball, brushing away the loose, old potting soil. Think of it like untangling a messy knot of hair. If the soil is packed like hard clay, you can dip the root ball into a bucket of lukewarm water to wash away the stubborn dirt clusters safely.
Step 4: Identify the Natural Separation Points
Take a close look at the base of the plant. You will see distinct clusters, individual crowns, or baby pups growing alongside the main mother plant. Look for gaps where the stems naturally divide. Every single piece you intend to separate must have its own dedicated set of leaves on top and a healthy bundle of roots attached at the bottom. If a section has no roots, it will struggle to survive in soil and your better off putting it in a water propagation jar instead.
Step 5: Tease, Pull, or Cut the Roots Apart
Using your fingers, gently wiggle and tease the roots of the target cluster away from the main mass. For plants like Peace Lilies or Pileas, they will often pop apart with a gentle tug. If the root network is an absolute solid block of tangled mesh, take your sterilized knife and cleanly slice straight down through the connecting root tissue between the crowns. Make your cuts decisive, swift, and clean.
Step 6: Pot Your New Collection into Fresh Soil
Congratulations, you just turned one plant into two, three, or more! Pot up each separated section immediately into its own individual container. Always choose a pot size that matches the size of the new, smaller root ball—never put a small, separated division into a massive giant planter, or the excess wet soil will drown the roots. Fill in the gaps with a lightweight, well-draining indoor potting mix enhanced with perlite or orchid bark.
Step 7: The Recovery Hydration
Give your newly separated plants a thorough watering until it flows freely out of the bottom drainage holes. This settles the fresh soil completely around the roots and eliminates any hidden pockets of trapped air. Place them in a warm room with bright, indirect sunlight, keeping them out of harsh, direct afternoon sun while they recover.
Essential Aftercare: Managing Post-Division Shock
Once the operation is complete, your newly divided plants are going to need some serious rest. Here is the real talk: your plants will likely look a little droopy, sad, or slightly wilted for the first week or two after surgery. Do not panic! This is completely normal transplant shock as their disturbed roots learn how to pump moisture from the fresh substrate again.
Keep their environment completely stable during this recovery window. Do not move them around to different rooms, protect them from dry drafts caused by air conditioning vents, and absolutely avoid adding any heavy chemical fertilisar for at least four to six weeks. The fresh potting mix already contains a gentle blend of nutrients, and adding more on top can easily scorch the sensitive, healing root tips.
By respecting these simple boundaries, LeafCare.xyz readers can easily minimize recovery times and enjoy a massive explosion of lush, beautiful top growth.
Reclaim Your Space with Absolute Confidence
Learning how to separate overcrowded indoor plants is one of the most empowering skills you can develop on your indoor gardening journey. It transforms you from a passive plant collector into an active, confident curator of your home environment. The process can feel a little scary the first time you do it, but once you see those individual divisions thrive and push out brand-new leaves of their own, your confidence will skyrocket.
Whenever you need reliable, expert-led indoor gardening strategies, troubleshooting tips, or step-by-step guides, let LeafCare.xyz be your go-to resource for indoor plant parents looking to grow a thriving green space at home. We are dedicated to walking with you through every single leaf pattern, potting transition, and care victory with absolute clarity.
Are any of the houseplants on your shelves looking completely overcrowded and ready for a split? Which variety are you planning to divide first this weekend? Let us know your experiences or drop your specific plant care questions in the comments below! If you want to keep your indoor jungle thriving, make sure to bookmark this page and subscribe to our weekly newsletter for fresh, actionable indoor gardening tips delivered straight to your inbox.
