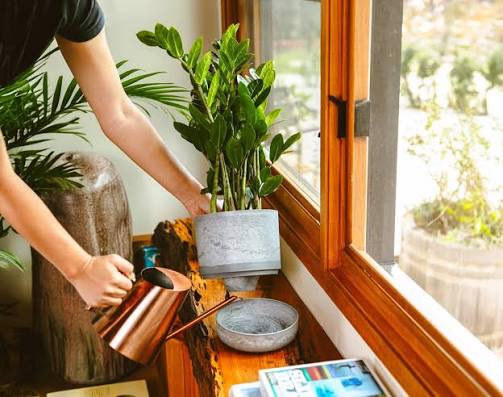
Want to stop killing your houseplants? Learn exactly how to use self watering pots for beginners and keep your indoor jungle perfectly hydrated.
How to Use Self Watering Pots for Beginners: The Ultimate Lazy Gardening Guide
Look, I get it, plant care can be frustrating but you should not give up your dream of a lush, indoor jungle just because you have a chaotic schedule. Between work deadlines, social commitments, and just trying to get enough sleep, remembering whether your Calathea needs water on a Thursday afternoon is a lot to ask. Here is the real talk: consistency is the hardest part of plant parenting.
If you have ever come home after a long weekend away only to find your favorite green baby looking completely shriveled and dramatic, you have probably looked into alternative potting options. Enter the sub-irrigation planter, more commonly known as the self-watering pot.
Many people think these gadgets are complex or reserved for greenhouse pros, but they are actually a total game-changer for casual growers. If you are currently staring at a new plastic setup and wondering how to use self watering pots for beginners, you are in the perfect place. At LeafCare.xyz, we are your no-judgment zone for indoor gardening, and today we are breaking down exactly how these pots work, which plants love them, and how to set one up without rotting your roots.
How Do Self-Watering Pots Actually Work?
Before we get into the dirt, we need to clear up a common misconception. Self-watering pots do not possess any electronic parts, AI smarts, or magical properties. They rely on basic physics.
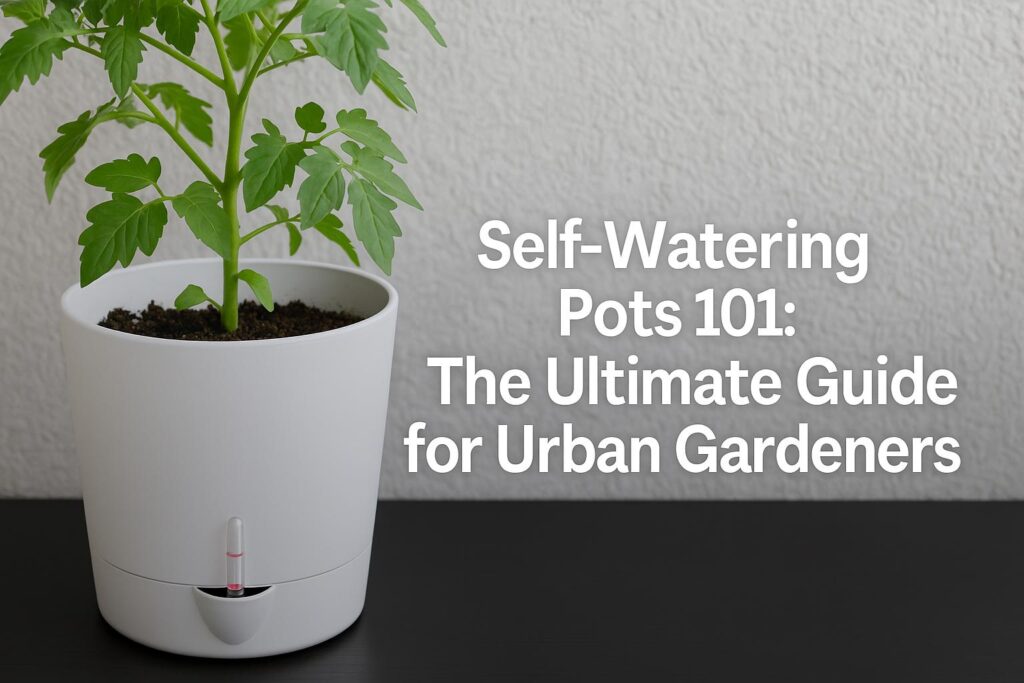
A standard self-watering planter consists of four core elements:
- The Growing Vessel: This is the top part of the pot where your plant and its soil mix sit.
- The Water Reservoir: A hidden chamber or basin located at the very bottom of the pot that holds extra water.
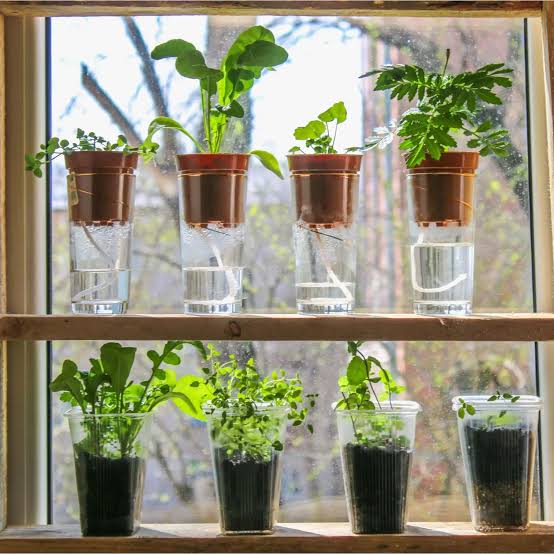
- The Wicking System: The bridge connecting the soil to the reservoir. This can be a strip of absorbent cotton rope, or small perforated pillars filled with soil that dip directly into the water chamber.
- The Fill Spout/Indicator: A tube on the side where you pour the water, often accompanied by a small floating indicator that tells you how full the reservoir is.
The magic happens through a proccess called capillary action. Think of how a dry paper towel automatically sucks up spilled liquid when just the edge touches the puddle. The soil in the top section pulls water up from the lower reservoir as it dries out, maintaining a steady, even level of moisture right at the root zone.
Matchmaking: Which Plants Love (and Hate) Sub-Irrigation?
Here is a major reality check: you cannot put every single plant into a self-watering planter. Because these systems keep the soil consistently damp, some plants will thrive beautifully, while others will rot and die within a week.
Tropical plants that grow naturally on damp jungle floors absolutely love this constant, stable hydration. On the flip side, desert natives that need their soil to dry out completely between waterings will get completely overwhelmed.
Self-Watering Compatibility Guide
To avoid a tragic potting disaster, use this reference table before you transition your plant collection.
| Plant Personality | Common Examples | Compatibility Status | Why It Works / Why It Fails |
| Moisture Lovers | Peace Lilies, Ferns, Calatheas, Fittonia (Nerve Plant) | Perfect Match | They crave consistent moisture and drop dead if they dry out for even a day. |
| Thirsty Tropicals | Monstera, Pothos, Philodendrons, Alocasia | Great Match | They grow rapidly when given steady hydration, provided your soil mix is chunky enough. |
| Arid Dwellers | Snake Plants, ZZ Plants, Jade, Cacti, Aloe Vera | Terrible Match | Their roots will quickly drown, turn mushy, and rot away from the constant moisture. |
| Edible Greens | Mint, Basil, Spider Plants, Potted Herbs | Excellent Match | Fast-growing herbs drink a massive amount of water and love sub-irrigation. |
Step-by-Step Guide to Setting Up Your First Self-Watering Pot
Ready to make the switch? If your setting up a brand-new sub-irrigation planter, you can’t just toss standard potting soil inside and call it a day. Follow this exact step-by-step breakdown to guarantee your setup functions perfectly.
Step 1: Prep Your Wicking Material
If your pot uses a physical fabric wick or string, thread it through the bottom holes of the growing liner. Ensure that several inches of the rope dangle completely into the lower reservoir space, while the other end sits flat inside the bottom of the planting basket where the soil will rest.
Step 2: Mix an Ultra-Airy Soil Substrate
This is the absolute most important step. Because the soil will constantly be drawing up moisture, standard potting soil from the garden center will quickly turn into a heavy, muddy bog. You must add drainage amendments to keep the mix loose and full of oxygen. Combine 50% standard potting soil, 30% perlite, and 20% orchid bark. This airy blend allows the roots to breathe even when the substrate is damp.
Step 3: Pot the Plant (The Top-Watering Phase)
- Place a thin layer of your loose soil mix at the bottom of the pot, directly over the wick.
- Gently remove your houseplant from its old container and shake away any excess compacted dirt.
- Center the root ball inside the new self-watering container and fill in the sides with your fresh soil mix.
- Crucial Tip: For the first 2 to 3 weeks after potting, you must water the plant normally from the top! The roots need time to grow downward toward the wicking zone before the capillary action can properly feed them. Do not fill the bottom reservoir yet.
Step 4: Fill the Reservoir
Once your plant has acclimated to its new home for a couple of weeks, it is time to turn on the automated system. Pour water directly into the side fill spout until the floating water gauge reads “Max” or until you see water pooling in the window.
Pro Tips to Avoid Root Rot and Fungal Issues
While self-watering planters make life significantly easier, they are not completely “set it and forget it” systems. You still need to practice basic maintenance to ensure your indoor jungle stays healthy.
Let the Reservoir Dry Out Completely
Do not keep the water tank filled to the absolute maximum 100% of the time. When the water indicator hits the “Empty” mark, leave it alone for a few days to a week. This creates a natural dry period that allows the soil to air out, giving the root system a chance to draw in fresh oxygen. Once the top inch of soil starts to feel slightly dry to your touch, go ahead and refill the reservoir.
Avoid the Fertilisar Flush Trap
When you water a traditional pot from the top, excess mineral salts from chemical fertilizers flush out the bottom drainage holes. In a self-watering setup, those minerals have nowhere to go, so they slowly rise to the surface of the soil, forming a crusty white layer. To prevent this, always use a highly diluted organic liquid fertilisar, or plan to flush your pot with clean water from the top down into the sink once every three months.
Watch Out for Fungus Gnats
Fungus gnats love damp topsoil. Because self-watering planters keep the soil consistently hydrated, these annoying little black flies might try to move into your pots. To stop them in their tracks, add a one-inch layer of decorative sand or fine gravel over the top surface of your potting mix. This blocks the adult gnats from laying eggs in the damp dirt.
Keep Growing Safely with LeafCare
Upgrading your collection with specialized tools is an incredibly smart way to protect your financial and emotional investment in your plants. Learning how to use self watering pots for beginners takes away the constant anxiety of under-watering and streamlines your weekly chores, allowing you to simply sit back and enjoy your beautiful green space.
Whenever you find yourself struggling with a yellowing vine, a mysterious bug infestation, or a potting dilemma, treat LeafCare.xyz as your personal digital greenhouse mentor. We are always here to provide human, practical, and highly effective advice for the modern plant parent.
Are you ready to try a self-watering pot? Drop a comment below and let us know which dramatic plant in your collection needs a hydration upgrade—we respond to every single plant question! Make sure to bookmark LeafCare.xyz and subscribe to our newsletter for a weekly dose of fresh indoor gardening hacks delivered straight to your inbox.
