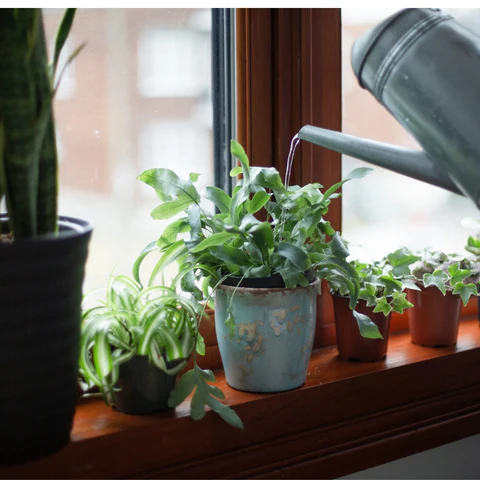
Master bottom watering to save your houseplants from root rot. Learn how to bottom water indoor plants correctly with this step-by-step guide.
How to Bottom Water Indoor Plants Correctly: The Ultimate Guide to Happy Houseplants
Let’s be completely honest for a second: watering houseplants is surprisingly stressful. You buy a gorgeous, vibrant green pothos or a dramatic peace lily, promise to love it forever, and then immediately face the ultimate plant-parent dilemma. Am I watering it too much? Am I watering it too little? Why is the soil bone-dry at the top but wet at the bottom?
If you have ever accidentally turned your favorite succulent into a mushy, yellow mess, look, I get it. Plant care can be frustrating but you are definitely not alone. The traditional method of pouring water over the top of the soil—known as top watering—is what most of us start with. However, it often leads to uneven moisture, fungus gnats, and the dreaded root rot.
Fortunately, there is a better way to keep your green babies thriving, and it is a total game-changer. Today, we are going to dive deep into how to bottom water indoor plants correctly. This simple technique ensures your plants drink exactly what they need, leaving the guesswork behind. Here at LeafCare.xyz, we believe that anyone can have a green thumb with the right approach. Let’s break down why this method works and how you can master it today.
What is Bottom Watering and Why Does It Work?
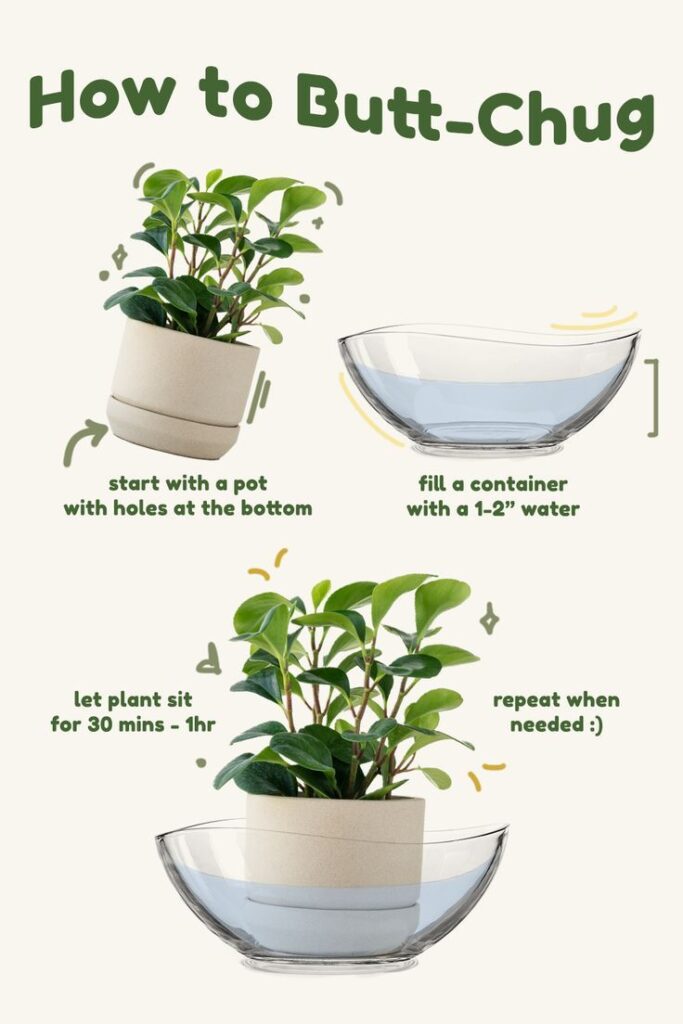
Bottom watering is exactly what it sounds like: allowing your plants to absorb moisture from the bottom up rather than pouring water over the soil surface. Instead of using a watering can to drench the foliage and topsoil, you place the plant’s nursery pot or container directly into a basin of water.
The secret behind this method is a scientific phenomenon called capillary action. Think of the soil inside your pot as a giant, microscopic sponge. When the bottom of the soil comes into contact with water, the moisture naturally climbs upward through the tiny spaces between the soil particles. The roots then take up exactly what they need, resulting in perfectly hydrated soil from top to bottom.
Top Watering vs. Bottom Watering
To help you decide which method is best for your current urban jungle, here is a quick comparison table breaking down the key differences.
| Feature | Top Watering | Bottom Watering |
| Water Distribution | Often uneven; can create dry pockets in the soil. | Completely even; ensures the entire root ball gets hydrated. |
| Fungus Gnat Risk | High; leaves the topsoil consistently damp, attracting pests. | Low; keeps the top layer of soil drier, discouraging gnats. |
| Nutrient Flushing | Flushes out accumulated salts but can also wash away nutrients. | Retains nutrients in the soil profile effectively. |
| Effort Level | Quick and easy for a large collection. | Takes a bit more time per plant, but requires less supervision. |
| Best For | Flushing soil; plants in large, heavy pots without drainage. | Small to medium plants; hydrophobic soil; moisture-loving varieties. |
The Surprising Benefits of Bottom Watering
Here is the real talk: switching to bottom watering isn’t just a trendy TikTok plant hack. It offers genuine, measurable benefits for your indoor garden that will save you time, money, and heartbreak in the long run.
Eliminates Fungus Gnats
If you have ever had tiny, annoying black flies buzzing around your face while you try to work from home, you know how miserable a fungus gnat infestation can be. These pests lay their eggs in the top one to two inches of moist soil. When you learn how to bottom water indoor plants correctly, the very top layer of soil often stays relatively dry while the root zone gets fully saturated. No moist topsoil means no place for gnats to breed.
Prevents Overwatering and Root Rot
Overwatering doesn’t actually mean giving a plant too much water at one time; it means watering too frequently, which suffocates the roots. Because bottom watering relies on the soil’s natural absorbency, the plant only takes in what it can hold. Once the soil is saturated, it stops absorbing water, making it much harder to accidentally drown your plants.
Encourages Strong, Deep Root Growth
Plant roots grow toward moisture. When you top water lightly, only the upper portion of the soil gets wet, causing the roots to stay shallow. By bottom watering, you ensure that the deepest part of the pot is thoroughly hydrated. This coaxes the roots to grow downward, creating a robust, stable root system that can support a massive, lush canopy of leaves.
Revives Hydrophobic Soil
Have you ever poured water onto a dry plant, only to watch it immediately run down the inside edges of the pot and drain out the bottom without actually soaking into the dirt? That is hydrophobic soil. When peat-based potting mixes dry out completely, they repel water. Bottom watering forces the soil to slowly sit in the moisture, breaking down that hydrophobic barrier and restoring the soil’s ability to hold water again.
What You Need to Get Started
Before we jump into the step-by-step proccess, you need to gather a few basic supplies. Don’t worry—you don’t need expensive boutique gear to do this right.
- A Container with Drainage Holes: This is non-negotiable. If your plant is in a decorative pot without holes, bottom watering will not work. Your plant must be in a plastic nursery pot, terracotta pot, or ceramic pot with a functional drainage hole at the base.
- A Large Basin or Tray: You can use a clean kitchen sink, a bathtub, a plastic storage bin, or individual deep saucers.
- Filtered or Room-Temperature Water: Indoor plants can be sensitive to the chlorine and heavy minerals found in cold tap water. Let your water sit out for 24 hours beforehand, or use a filtered pitcher.
Step-by-Step Guide: How to Bottom Water Indoor Plants Correctly
Now that you have your supplies ready, let’s walk through the actual technique. Follow these steps carefully to ensure your plants get the perfect drink every single time.
Step 1: Check the Soil Moisture
Before you even think about moving your plants, make sure they actually need water. Stick your finger two inches into the soil, or use a wooden chopstick. If it comes out clean and dry, it’s time to water.
Step 2: Fill Your Basin
Fill your clean sink, tray, or container with about one to two inches of room-temperature water. If you want to feed your plants, this is also the perfect time to mix in a diluted, water-soluble organic fertilisar to ensure even nutrient distribution.
Step 3: Place the Plants in the Water
Take your plants out of their decorative ceramic covers (if they are in plastic nursery liners) and set them directly into the water. The water level should reach about one-quarter to one-third of the way up the side of the plant pot. If your pots start floating, you have added too much water; gently pour some out until the pots sit flat.
Step 4: Let Them Soak (15 to 30 Minutes)
Leave your plants alone to do their thing. Grab a coffee, catch up on your favorite show, or browse through LeafCare.xyz for more plant styling ideas. Over the next 15 to 30 minutes, you will notice the water level in the basin dropping as the soil drinks it up.
Step 5: Check the Topsoil
To know if your plant is fully hydrated, touch the very top layer of the soil. If the topsoil feels damp to the touch, the capillary action is complete, and the plant has absorbed all the moisture it needs. If the top soil still feels bone-dry after 30 minutes, let it sit for another 10 minutes.
Step 6: Drain and Dry Thoroughly
This is the most critical step of the entire process! Lift the pot out of the water basin and let the excess water drain out of the bottom holes completely. Leave it in the sink or on a wire rack for 10 to 15 minutes. Never put a freshly watered plant directly back into a decorative saucer or cover pot while it is still dripping, as sitting in stagnant water will cause the roots to rot.
Common Mistakes to Avoid
While bottom watering is incredibly forgiving, there are a few common pitfalls you should look out for to keep your urban oasis in peak condition.
Leaving Plants in Water for Too Long
While leaving your plant for 20 minutes is great, leaving it in a tub of water for five hours or overnight is a recipe for disaster. Once the soil is fully saturated, the roots need oxygen. Leaving them submerged for too long cuts off their air supply and invites root rot bacteria to take over. Set a timer on your phone so you don’t forget them!
Ignoring the Need to Flush the Soil
While bottom watering is fantastic for routine care, it does have one limitation: it doesn’t wash away the natural mineral salts, fertilizer residues, and tap water byproducts that build up in the potting soil over time. If you notice a white, crusty layer forming on the top of your soil or around the rim of your terracotta pots, that’s mineral buildup.
To fix this, make it a rule to top water your plants thoroughly once every few months. Let the water run freely out of the drainage holes to flush out those accumulated salts, and then return to your normal bottom-watering routine next time.
Trying to Bottom Water Massive Pots
Let’s face it: trying to haul a six-foot-tall fiddle leaf fig planted in a heavy, 15-gallon ceramic pot into your bathtub is an ER visit waiting to happen. Bottom watering is best reserved for small to medium-sized houseplants that you can easily lift and move around. For your giant statement plants, sticking to a careful top-watering routine is much safer for both your back and your floor.
Your Go-To Strategy for a Thriving Green Space
Mastering how to bottom water indoor plants correctly is one of the most effective skills you can develop as a modern plant parent. It takes the stress out of your weekend chore routine, keeps your home free of pesky fungus gnats, and ensures your green companions grow strong, healthy roots that can handle whatever life throws at them.
Remember, plant care isn’t about being perfect; it’s about learning what your unique green space needs to flourish. Whether you’re trying to save a dramatic fern or keep your pothos collection trailing across your shelves, taking the time to understand their root systems will pay off in beautiful, lush growth.
If you found this guide helpful, don’t forget to bookmark LeafCare.xyz so you always have expert, stress-free plant care strategies right at your fingertips. Have you tried bottom watering before, or are you nervous about making the switch? Drop a comment below with your current plant questions, or subscribe to our weekly newsletter for the best indoor gardening tips delivered straight to your inbox!
