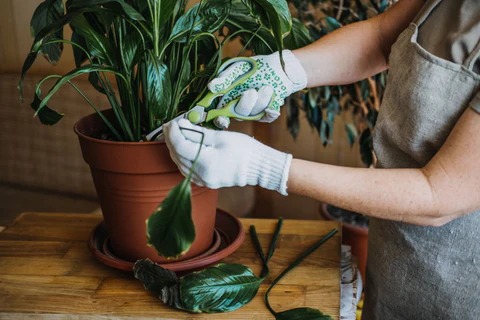
Want a full, lush indoor jungle? Learn how to prune indoor plants for bushier growth and say goodbye to leggy, sparse stems forever!
How to Prune Indoor Plants for Bushier Growth: The Ultimate Guide to a Fuller Jungle
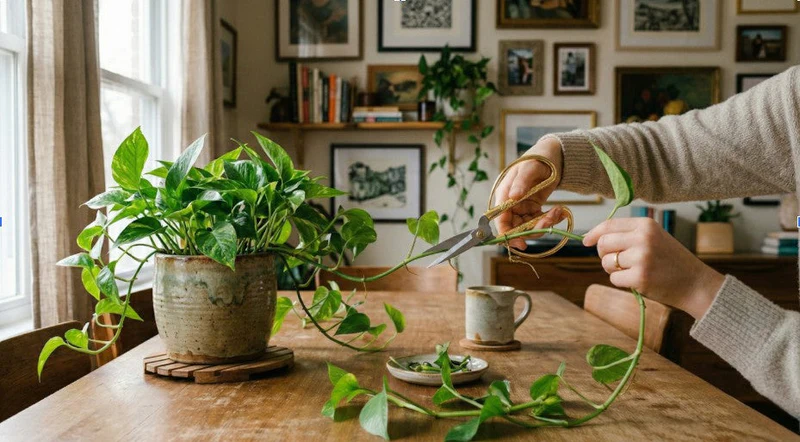
You bought a pothos or a monstera adansonii hoping for that thick, overflowing, Pinterest-worthy waterfall of leaves. Instead, a few months later, your dealing with a couple of extremely long, skinny stems stretching across your room with about three leaves on each vine. It looks sparse, it looks leggy, and it is definitely not matching the aesthetic vibe you had in mind.
When indoor gardeners see their plants growing thin and spindly, their immediate instinct is to buy a new one or double up on watering. But the solution isn’t more water or extra plant food. The real secret to fixing a sparse plant is taking a pair of sharp blades directly to its stems.
Look, I get it, plant care can be frustrating but cutting pieces off a plant you’ve worked so hard to keep alive sounds absolutely terrifying. It feels completely counterintuitive. Here is the real talk: your plant actually wants you to cut it. In fact, learning how to prune indoor plants for bushier growth is the single most effective way to unlock explosive, full, and voluminous foliage.
As a senior indoor gardening expert here at LeafCare.xyz, I have pruned thousands of vines, trees, and shrubs to perfection. Today, we are going to dive deep into the fascinating science of plant hormones and give you a foolproof blueprint to hacking your plant’s growth so you can transform your leggy green babies into thick, lush showstoppers.
The Trimming Strategy: Pruning Profiles by Plant Type
Before you grab your shears and go wild on your collection, you need to understand that different plants react to pruning in different ways. Giving a trailing vine a haircut is a very different proccess than shaping a woody indoor tree.
| Plant Category | Examples | Pruning Objective | Expected Reaction |
| Trailing Vines | Pothos, Philodendron, English Ivy | Cut leggy vines to stimulate full growth at the top | Multiple new vines activate from node joints |
| Aroids & Climbers | Monstera Deliciosa, Arrowhead Plant | Control size and remove old, non-split leaves | Redirects energy into producing larger fenestrated leaves |
| Woody Indoor Trees | Fiddle Leaf Fig, Rubber Tree, Money Tree | Cut the main apical tip to encourage branch splitting | Forcing a single trunk to divide into two or three branches |
| Bushy Soft-Stems | Nerve Plant, Polka Dot Plant, Coleus | Regular pinching of tiny top leaf buds | Keeps the plant low, dense, and tightly clustered |
The Science of Pruning: Hacking Plant Hormones
To truly understand how to prune indoor plants for bushier growth, we have to look at the master control system of plant biology: hormones.
Plants are naturally ruled by a growth habit called apical dominance. At the very tip of every vine or branch, there is a main terminal bud that produces a specific hormone called auxin. Auxin is essentially a selfish hormone. It tells the plant to channel 90% of its raw energy into growing straight ahead as fast as possible, while actively suppressing the lower, side buds (called lateral buds) from growing.
In nature, this helps the plant race toward the light on the rainforest floor. But in an apartment, it results in a single, super-long, lonely-looking vine.
When you make a clean cut and remove that dominant terminal tip, you instantly destroy the local factory of auxin. With that hormone gone, the plant panics in the best way possible. It redirects its energy to the dormant lateral buds lower down the stem. Within a couple of weeks, those sleepy side buds wake up and burst forth as brand-new, independent branches. By cutting one stem, your forcing the plant to grow two or three new ones in its place.
Step-by-Step Guide to Pruning for Maximum Fullness
Ready to give your indoor jungle a customized structural makeover? Follow this careful step-by-step method to cut with absolute confidence and guarantee a fast recovery.
Step 1: Gather and Sterilize Your Tools
Never use dull kitchen scissors or try to snap stems off with your bare fingers. Crushing a stem leaves a ragged, bruised wound that is a major open invitation for fungal infections and pests. Invest in a sharp pair of bypass pruning shears or micro-tip trimming snips. Before you make a single cut, wipe the blades down thoroughly with rubbing alcohol or sanitizing wipes to ensure your not transferring bacteria into your plant’s vascular system.
Step 2: Locate the Node Joints
This is the most critical step of the entire routine. A node is a slightly swollen bump on a plant stem where leaves emerge, aerial roots grow, and dormant lateral buds live. The smooth space on the stem between two nodes is called the internode. New growth can only happen at a node. If you cut right in the middle of a long internode space, that leftover bare stick will just wither, turn brown, and rot away.
Step 3: Make the Perfect Angular Cut
Identify the node where you want your plant to start branching out. Position your sterilized shears about one-quarter of an inch above that node (closer to the tip of the plant, away from the root system). Make a clean, swift cut at a 45-degree angle. The angle prevents moisture from pooling on top of the open wound, which lowers the risk of rot while the plant forms a healthy protective callus.
Step 4: Propagate Your Leftover Cuttings
Don’t throw those trimmings in the trash! The pieces you cut off are packed with growth hormones. Strip the lower leaves off the cuttings to expose a few bare nodes, and drop them into a jar of clean, room-temperature water. Place the jar in bright indirect light, and within a month, you’ll have a collection of rooted cuttings. You can plant these back into the top of the mother pot to instantly double the density of your container!
Post-Pruning Aftercare and Maintenance
Once the surgical proccess is complete, your plant needs a little extra love to help it heal and build out that new foliage.
Manage Your Watering Habits
Because your plant has just lost a portion of its leaves, it cannot transpire or use water as quickly as it did before the trim. Keep a close eye on the soil moisture. You will likely need to extend the time between your watering sessions for the first two weeks until the new branches emerge. Keep the soil beautifully balanced—never let it turn into a swamp.
Give It a Nutritional Boost
Rebuilding new tissue requires a massive amount of physical energy. Once you see the tiny, bright green nubs of new branches beginning to push out from your cut zones, give the plant a treat. Add a balanced liquid houseplant fertilisar diluted to half-strength into your watering can. This delivers an immediate supply of nitrogen and micronutrients straight to the roots, fueling rapid leaf development.
Troubleshooting Sudden Meltdowns
If your plant wilts slightly the day after a major pruning session, don’t panic. Plants experience a minor form of physical shock when they lose tissue. Keep it in a warm, draft-free spot with plenty of bright, ambient light. As long as the root system is healthy and you didn’t overwater it, it will stabilize and start showing off its new bushy habit within fourteen days.
Build a Fuller, Richer Aesthetic
At the end of the day, understanding how to prune indoor plants for bushier growth changes your entire relationship with your indoor garden. You stop being a passive observer watching your plants grow out of control, and you become an active designer shaping your space. Don’t be afraid of the shears; pruning is a natural, rejuvenating habit that keeps your collection looking incredibly vibrant and structurally sound for years to come.
Whenever you find yourself nervous about making a cut, struggling with a watering schedule, or dealing with an annoying pest issue, remember that LeafCare.xyz is your go-to resource for indoor plant parents looking to grow a thriving green space at home. We are dedicated to providing clear, practical, and completely judgment-free support for every step of your plant journey.
If this pruning masterclass gave you the courage to fix your leggy vines, make sure to bookmark LeafCare.xyz so you can reference our care profiles whenever you do your weekend plant checkups. Want a regular delivery of non-boring plant care advice, propagation tutorials, and easy styling hacks sent straight to your inbox? Subscribe to our weekly newsletter today! If your currently staring at a leggy plant trying to figure out exactly where to place your shears, drop a comment below with a description of your plant, and let’s plan the perfect haircut together!
